Friday, August 14, 2009

Heroics: they're back...and in PUG form.


Ever since 3.2 landed with it's love-it-or-hate-it change to the Emblem system in heroics, LFG has suddenly become a much more active place. What once was a terribly litany of 'LF2M Tank+Healer' has risen into a wonderful hymn of 'LF DPS!' People are doing heroics again and I couldn't be more excited!

Even as a raider I still love doing 5mans. Perhaps it's the recruitment officer in me, who loves to spot new talent among the blue tinted masses, or the raid leader in me that loves to explain fights, but I just can't get enough.

At the same time, it's been nice to see other raiders coming back down to the level of the common player. That concern and fear that one gets before joining a PUG hasn't been as acute lately thanks to the fact that most heroic groups, on my server at least, include at least one other full t8.5 raider who's out to get that final piece of Conquest gear. Odds are even better if you're doing the daily, as everybody can use Triumph emblems (all of the tier gear up to Heroic 25man ToC requires Emblems of Triumph to obtain.)

So now that we're all rushing back to content we may have left behind as quickly as one month after the launch of Lich King, which Heroic Dungeon is your favorite?

Thursday, August 13, 2009

War Stories: Onyxia's Lair

With the recent announcement that Onyxia would be making a return in the upcoming patch 3.2.2 I started getting a little misty eyed for the raids of yore. In a nostalgic haze I stumbled through the heroic daily this morning (Utegarde Pinnacle) remembering the good old days when hybrids were healers and frost was the best DPS build for a mage. During one of the packs following the first boss I was happily skinning the dogs when I noticed that one wasn’t available to be skinned. Still trapped in November of 2006 I joyously yelled out ‘LOOT THE HOUND’ expecting a round of giggles and groans from my groupmates.

All I got was ‘sure m8’ from the rogue.

Crushed, I realized that these poor folks had probably never set foot in Molten Core, especially when Core Hound Leather was still a valuable commodity. To them MC was simply another achievement (a particularly small one at that) to be earned on an off-day.

So in honor of the return of the big bitch herself, I figured I’d take a few days to go back over the raid content that at one time or another was SERIOUS BUSINESS, starting with that vile pit of whelplings known as Onyxia’s Lair.

Depending on when you got into raiding you may have either headed here or MC first, but for the original raiders, Ony was all there was. Actually the lair of Onyxia, the Broodmother for the Black Dragonflight, one of the biggest of the bads in Azeroth. It was a prototype of many of the stand-bys that would be included in later content such as attunements and one-boss instances.

Depending on your faction you had to embark on a lengthy series of quests before you could even step foot in the instance. These have since been removed, but the scars are still there for those who had to do it. I’ve never done it Horde side, but I’ve heard finding Rexxar was quite the challenge. Instead, as Alliance, you were tasked with springing Marshal Windsor from Blackrock Depths, a small sidequest in an instance so crowded it can only be fully completed with a handle of vodka and some good friends. Once you managed to get him out you then had to ascend the upper reaches of Blackrock Spire and defeat a high ranking official of the Black Dragonflight: General Drakkisath.

Needless to say, it was always fun to hear, moments before zoning in, that the new trial hadn’t gotten attuned yet.

With attunement came a nifty necklace that allowed entrance as long as it was in your inventory. That’s right, either kiss that one slot goodbye or make sure you remember to bring it before every raid.

The trash leading up to her wasn’t entirely memorable. Giant dragonkin, fire nova that gibbed melee, blah blah blah. You were ready for the big show, not this rabble. Once you cleared the trash in the hallway leading up to Onyxia (and cut through the lava pool to avoid the final pull of course) you were greeted with one of the most intimidating sights in the game thus far:

She was just waiting for you, lazily dozing in her lair. Led by your tank all 40 of you would run down that ramp, spamming whatever battle cry macro you had.

At the time Onyxia was an insanely long and complex encounter. It had three phases:

Phase 1 was a tank and spank. She would cleave, wing buffet, and tail sweep. These are all old hat now, but back then trying to get melee out from behind her was practically impossible. It was common to see at least one rogue go flying into the breeding pits on either side of her, a horde of whelps trailing behind him as he sprinted back. Also, since this was before the invention of such lovely abilities as Shield Slam, threat was of primary importance here. DPS could, and would, pull aggro off the tank, getting entire sides of the raid blasted by her flame breath.

The flame breath was also interesting, as it was the first attack that required the use of resistance gear. Tanks had to be FR capped before even looking sideways at Onyxia, lest they get gibbed by her powerful gouts of fire. Sure, it only did 3-4k damage, but that was a lot back then!

Once Onyxia was reduced to 65% phase 2 began, and this is where things got interesting.

Onyxia phase 2 stayed near and dear to the hearts of trolls well into BC. Cries with every patch that she Deep Breathed more often can still be heard to this day if you listen hard enough. Still a source of great contention, phase 2 introduced Deep Breath, a nefarious mechanic that still hasn’t really been duplicated to this day. In phase 2 Onyxia would take to the air, flying back and forth in her chamber spitting fireballs at random raid members. At the same time, her whelplings would spring to her defense, flooding out of the breeding chambers on either side. You had to split your raid into two separate groups filled with tanks, mages (this was before anybody else could REALLY AOE), and healers whose job was simply to kill and control the whelps before they flooded over the raid.

While you were busy with all this you might’ve had the time to look down at your chat log and notice Onyxia emote ‘Onyxia takes a deep breath…’ before you died. Occasionally (and to this day I’m pretty sure nobody knows how this is determined) Onyxia will take a deep breath and blow a wave of flame over half of the room, most likely killing anybody inside of this. As a raid you had to act quickly when the call came, running either to the other side or scaling the walls.

It was theorized that as long as Onyxia had a full set of DOTs on her, she wouldn’t Deep Breath. Whether this is true or not, this has been immortalized forever thanks to a certain anxious raid leader. To this day the rallying cry of MORE DOTS can still be heard coming from the mouths of raid leaders across Azeroth.

Whatever the case, as you hit 30% (or sometimes less, Onyxia was finicky that way) she would land and immediately kill a healer. Well not always, but it was practically inevitable considering how back snap aggro was back then. The tank would pick her up and phase 3 would begin.

Phase 3 was much more hectic that phase 2. It went much the same way as phase 1 did, except with two important changes: Bellowing Roar and Lava Walls. Every now and then the ground would begin to tremble and suddenly the entire raid, tank included, was sent cowering in fear for a few seconds. Back in the day this meant an aggro wipe for the tank, which spelled doom. This meant one of two things:

You played Alliance and had a dwarf priest that kept Fear Ward on the tank or you had a real tank that learned how to stance dance. Stance dancing is a complicated term for quickly swapping into Berserker Stance and using Berserker Rage, which makes you immune to fear, before quickly popping back into Defense Stance before you’re gibbed.

I can tell you, as someone who had a dwarf priest pre-BC, most Alliance tanks didn’t know how to stance dance. Still a virulent debate to this day, the fight over Fear Ward was ended when Horde was given it during BC and Blizzard quickly allowed tanks to retain aggro during fears.

At the same time as the roar, lava would fly out of the ground, doing heavy enough damage to anyone running through it to stress out your healers. It wasn’t uncommon to get feared through two or more lava waves in a single fear either, so be ready for a speedy death if you aren’t topped off.

Should you be able to overcome all these challenges, Onyxia would fall and you would get a Stormrage Helm and Nemesis Helm…again…for the third week in a row. I’m not bitter, not at all.

If you got lucky, she would drop two tier 2 helms (before most guilds even knew that tier 1 existed) along with some other random items (most likely a Ring of Binding and not that Deathbringer or Vis’kag you’ve been waiting for) alongside her OWN HEAD, which could be redeemed for a variety of tasty rewards and a few hours of glory taking screenshots in front of it in either Stormwind or Orgrimmar. She also dropped an amazing 18 slot bag, which was the biggest anybody had seen at the time, which was usually the most hotly contested piece of loot as time went on. Lastly, when skinned, she would offer up 2-4 Scales of Onyxia, whose use would become apparent much, much later.

And that’s Onyxia’s Lair, the first, and one of the best, raid instances in World of Warcraft. Next up will be Molten Core, which was the other potential entry point raid during vanilla WoW.

How about you, do you have any great stories from Onyxia’s Lair? Share them and let’s all get excited for Patch 3.2.2 together!

Onyxia to return, DOTs suddenly in demand!

One of my favorite things about Wrath of the Lich King is that with it Blizzard is finally bringing back a quintessential fantasty staple: Dragons. If you played at all during Vanilla WoW, you would remember that the game used to be chocked full of them. Nefarion and his 3 drakes, Azuregos, and even Ahn'Qiraj had you consorting with the Bronze Dragonflight.

But it all started with the Broodmother herself: Lady Onyxia. For most players it was thier first real raid, the first time they ever saw that many people together. There was something magical about seeing 10 frostbolts arcing through the air during the air phase, something wonderful.

Onyxia holds a special place in the hearts of vanilla raiders. A friend of mine still has a 24x36 glossy poster of his guild fighting Onyxia in his room, complete with Magister's Shoulders and Glowing Brightwood Staff. He doesn't even play WoW anymore, but Onyxia was just that special.

Therefore, it's no real surprise that it's been announced that Onyxia is coming in patch 3.2.2.

According to Zarhym Onyxia will be coming back as a up to date encounter with both 10 and 25 man versions. Her loot will also be updated, including high level versions of the classic t2 helms we all fought over (and cried over when double Stormrage dropped...again) in addition to a 310% speed mount fashioned after the big lady herself.

He assures us that the encounter will be getting tweaked to fit modern raiding, but that we still have those lovely Deep Breaths to look forward too. Perhaps now we'll be able to figure out what causes them.

In addition to this, Blizzard will be offering another pet for those who log on during thier 5th anniversary, a tiny Onyxia whelpling. The anniversary event begins in November, so most likely we'll see something on the PTRs pretty soon.

I for one am super excited about this. Onyxia was always one of my favorite encounters and I still refer to it when discussing great encounter design. I can't wait to see what they do with it knowing what they do now, especially considering how one of the biggest parts of the fight, the random fear, is something that Blizzard has moved away from since BC.

So until we see this on the PTRs, get your DOTs out and practice running to the center!

Wednesday, August 12, 2009

Healing Heroic Trial of the Champion the 5-man

While Patch 3.2 brings with it a whole new raid instance, it’s safe to say that the feature that will draw the most attention is the inclusion of a whole new 5-man instance, similar in difficulty and reward to Magister’s Terrace: Trial of the Champion. If my server is any indication, the place is popular, with LF Tank and LF Healer spam rocking Trade, LFG, and Icecrown General chats. Similar to Magister’s Terrace, the place is tougher than the current crop of Heroic dungeons, but carries with it significantly greater rewards. Imagine my chagrin when I noticed that the healing mace had the same stats as my hard won Pulse Baton from Mimiron-10. That’s right folks, along with the other host of loot-catch-up-changes in 3.2, H-ToC drops Uld10 level loot, enough to get even the most backwards raider ready for ToC10 and 25. I’ve even seen full t8.5 raiders picking up upgrades from both normal and heroic ToC, so the place is filled to the gills with good stuff.

Of course, they’re not just HANDING it out. We’ve got a few more weeks before the new wing of Vault of Archavon can do that. No no, you’re going to have to work for your fat purples, and just like Magister’s Terrace, H-ToC will put you through the ringer if you’re not ready for it, but that’s what I’m here for, to make sure you know what to do before your PUG shouts ‘OMG NOOB’ and boots you.

The background to the instance is that the Argent Crusade wants to make sure the valiant heroes heading to Icecrown in patch 3.3 are as well-equipped and experienced as they say they are. The true challenges lie in the raid level encounter, but the 5man version draws upon the best the Horde (or Alliance) has to offer. The first encounter pits you against 3 randomly chosen champions from the opposite faction in a battle royale similar to the 5v5 boss from Magister’s Terrace. Before this though, you have to put your jousting (hold your groans!) skills to the test.

(Instance note: this place is short, so I recommend saving Heroism for the final phase of the final boss just in case the 10 min cooldown on Exhaustion isn’t up by then)

Jousting Phase – Boss 1

The first ‘trash’ of the instance occurs after your three opposing champions have ridden out. Each comes with three squires from their faction that will ride out and assault your group. There’s no trick here, just wipe them out. Once all three groups of three have been dropped, the three champions themselves will ride out after you. Again, this is pretty easy if you’ve kept up on your jousting dailies. If not, the key is to keep up a 3 stack of your shield (button 4) at all times while using charge (button 3) whenever possible. Should you be knocked from your steed, you can quickly run to the wall and mount another should you not draw the ire of one of the champions as you go.

Once a champion has been vaulted and is sprawled out on the floor they’re not entirely out of the fight yet. After 15-30 seconds they’ll get up and wander slowly to another mount along the edges of the arena. Should they get there before you can trample them by running them over, they’ll be back on a mount with 50k health. Not much, but annoying none the less.

One major tip for this phase is to try and keep all the bosses in the same place in the room, as far from the walls as possible. Not only does this make keeping them on the ground easier, but when phase 2 rolls around, the tank won’t have nearly as hard of a time rounding them all up.

As a healer this phase requires no work, just jump on a horse and have some fun (well, for the first time. Anybody who has the Crusader title can tell you how much ‘fun’ jousting is.)

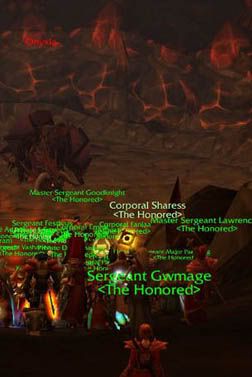
Arena Phase – Boss 1

Once all three champions have been vaulted, you’ll be booted off your mount and sent into the second phase of this fight. The moment you’ve all been thrown can be very chaotic, as the three mobs will all glom onto whoever they can (which will probably be you) until the tank can run around and pick them all up. If you’ve managed to clump them all up during phase 1 this won’t be too bad, but if not there is a trick that makes this part of the fight significantly easier: just run out. If your entire party exits the instance, the fight will reset and all three champions will be standing around near the door shortly after you come back in. The jousting phase will be over and you can properly prepare for what’s probably the hardest fight in the entire instance. If you prefer to do it the more legitimate way, make sure to equip your weapons as you land and get ready to heal your face off.

There are 5 possible champions for you to face, each a different class with different abilities and strategies. I’ll list each below:

In most cases this will be the one you want to kill first. He has a chain lightning that does minimal damage and a healing wave that will prove to be your bane if you can’t lock it out. Make sure somebody is interrupting this at all times, as he can heal through heavy dps on a single target if left unmolested. As a resto shaman I find it easy enough to toss a wind shock his way whenever I notice his casting it, but since you’ll probably be DPSing this guy down first anyway, your DPS should be more than capable of interrupting it.

In my opinion the least dangerous of the five, but your experience may vary. She casts a relatively low damage fireball at whoever has threat on her, does a mildly annoying Blast Wave (mainly annoying due to the knock back and daze), polymorphs a party member for 4sec occasionally, and can self-buff herself with a haste buff, increasing her casting speed by 100% for 10sec. I personally haven’t seen this become a serious issue, but word on the street is that it can be devastating, so your mileage may vary. Her damage output is pretty low (just like a real mage amirite OHHHHHH) and the polymorph is short enough to almost be negligible, so as long as you purge the haste buff off her when you see it, you should have no problems tanking her. You may want to interrupt one of her early casts to help the tank keep her close. Be wary about pulling aggro on her, especially if the tank isn’t paying enough attention to her.

Easily the most deadly of the five. Both of his weapons have deadly poison on them, which places a stacking DOT on whoever he hits with them. He also has Fan of Knives, which hits everybody in 8 yards, and applies the poison to them. In addition to this, he does use Eviscerate, but since we can’t see his combo counter, who knows. The last, and most annoying / potentially devastating thing he does is throw a bottle of poison on the ground that will create a green cloud, similar to the early trash in Botanica. Standing in this cloud will cause great damage to whoever is in it. Make sure your tank is especially aware of this, as in addition to FoK and other AoEs, this can spell quick death for your melee. He can throw this at ranged as well, so just be ready to move when you see the green cloud. As a resto shaman, Cleansing Totem can save your life here, keeping the deadly poison from stacking too high on the tank and melee without requiring you to waste GCDs clearing it. As long as the tank keeps the boss away from the green clouds, this guy will go down fast.

Middle of the field in terms of difficulty. This guy will peg whoever has the most threat on him with arrows, occasionally using multi-shot. If the tank is too in his face, he will use Disengage and go flying backwards. This makes him rather annoying to tank, but you can easily move the fight back to him to prevent him from getting too multi-shot happy. He also has a channeled ability that enchants his arrows with lightning, causing them to do an extra 2.8-3.2k damage each. Interrupt this when he’s casting it or purge the buff. Similar to the mage, be ready to accidentally pull aggro from the tank on this guy, as he can be a little difficult for an inexperienced tank to handle.

Potentially devastating, potentially easy. Similar to any warrior in PVP, he can do a lot of damage if left uncontrolled, but is easily controlled. He has a Mortal Strike that’s like every other Mortal Strike, in that it reduces healing received on the tank by 50% for a short period. He does a throw that knocks people back, can intercept even though I’ve never actually seen him do it, and finally has Bladestorm. Just like an Arms warrior, he’ll start doing massive AoE and spinning around. Like with most other bosses with a Whirlwind, melee needs to be very careful about this, as it can very quickly smash undergeared melee, similar to the faction boss in H-Nexus. As a healer you need to pay close attention to him and when he starts spinning and glowing red, be ready to put out some serious heals. I’ve heard they can be stunned (wouldn’t know as a shaman blah) so throw down a Kidney Punch or Hammer of Justice and you’ll nullify this threat. Haven’t tried disarming yet, but it should work. Let me know!

As a resto shaman specifically, this fight isn’t nearly as bad as some others. Make sure to drop Cleansing Totem if you have the rogue, as it can keep the Deadly Poison under control. If you have a melee heavy group, spamming Chain Heal on the tank does wonders healing through all the melee focused AoE, and with the recent changes to Improved Water Shield your mana pool won’t dip quite as far. As with most fights, situational awareness really does wonders here, especially when it comes to managing aggro on the ranged mobs. If you notice that one of your ranged has pulled aggro (or you have) try and position yourself between the ranged and the melee and cast Chain Heal on the further person out. With luck it’ll bounce back to you and through you to the melee, keeping the heals rolling. If not, toss out Lesser Healing Waves or Riptides on the offending ranged in between Chain Heals.

This fight really only becomes a problem if your tank either isn’t tanking all three mobs or is standing in the green cloud. If you notice that your interrupts on the Shaman are failing and you can spare the GCD, use Wind Shear to keep him from healing.

What’s nice about this fight being placed in the place it is is that it really does teach newer healers one of the most important lessons about healing: resourcefulness. Unlike some raid level encounters, you can’t just sit still and spam one heal over and over again in this fight, you need to pay attention to outside factors as well as change your focus depending on how the fight is going. If you can handle this fight, you’re probably ready to learn the finer points of raid healing!

Argent Boss – Trash

Once the three champions go down and you’ve collected your loot, the Argent Crusade gets their chance at you. Three trash pulls of three will come out followed by either Eadric the Pure or Argent Confessor Paletress.

The pulls are separate, so take your time drinking up and rebuffing as necessary before engaging. Each has an Argent Monk, Argent Priestess, and Argent Lightwielder in them. Kill order should be Priestess, Lightwielder, then Monk.

The Priestess will heal, drop a weak Shadow Word Pain, occasionally Mind Control for a few seconds, and drop a Lightwell-esque thing with 5k health that heals nearby allies. Kill it, it shouldn’t take long.

The Lightwielder is the most dangerous because he will occasionally cast something called Blazing Light, which does 3.5-4.5k damage to all enemies and heals nearby allies for the same amount. Watch out and make sure to interrupt it whenever possible.

The Monk can be tanked normally, but at 1% he’ll cast Divine Shield and channel something for 10 sec that will lower your movement and attack speed. Wait it out and finish him off. Make sure you have a decent amount of mana going into the final trash pull, as once it’s defeated the boss will immediately aggro. It helps to have the tank near the boss when this happens so a DPS or (gasp) healer doesn’t get quickly two shot.

Argent Boss

The easier of the two, Eadric is a tank and spank with a few interesting abilities. Similar to a Paladin, he has a Seal on him that gives his weapon swings a chance to crit even on a defense capped tank, so if your tank is getting crit it’s not his fault.

He also will occasionally cast something called Radiance, which does 6-6.5k damage to anybody looking at him as well as disorienting them for 2 sec. This has a 3 second cast, so when the warning comes up, simply turn away. As a healer you can continue healing through this, so don’t worry. If you have a hard time turning, try facing away the entire fight.

The more interesting ability he has (and one that can cause the biggest problems for a healer) is his Hammer of Justice – Hammer of the Righteous combo. Occasionally (2-3 times a fight) he’ll stun a random party member for 6 seconds. Shortly after stunning them he’ll toss a magical hammer at them for 16k damage as long as they’re still stunned. The stun is a magic effect, so if you can remove it, remove it as quickly as possible. If they’re not stunned they have a chance to catch the hammer and toss it back at him for the same amount of damage. Killing him with one of these hammers is actually an achievement for the fight. If you can’t remove the stun, there’s a good chance that anybody hit with the hammer will survive it, even if it’s just barely, so make sure you keep everybody topped off at all times just in case. I usually queue up a Healing Wave about 1-2 seconds after the stun lands. Since tank damage on this fight isn’t especially high (with a well geared tank I can heal this using only Riptide) getting stunned yourself shouldn’t be too big of a deal, but tank cooldowns should be used if there’s any doubt.


Much more interesting than Eadric, Paletress will dredge up terrible memories of fights you may have never even encountered to fight against you. A priest type character, she’ll come out casting Holy Smite and Holy Fire, which both should be interrupted as often as possible, with an emphasis on the Holy Fire to prevent the sizeable dot from doing too much damage. Smite does 5.5-6.5k damage, while Holy Fire does 2.5-2.3k with 4k over 8 sec. She casts these on random targets, so good interrupts will keep the damage very low at first.

Of primary importance is her Renew, which heals for 33k every 3 seconds. She can cast this on both herself and the memory she summons later, so make sure to purge or remove it as quickly as possible if you can’t interrupt the 2.5 sec cast.

At 25% Paletress puts a Reflective Shield on herself that reduces damage done by 100% and reflects 25% back to the caster. She then summons a terrible beast of shadow that happens to be one of a variety of previous bosses, ranging from Hogger to Illidan. Fortunately this creature has none of the abilities of what it looks like, instead casting a fear (which will be announced by a raid warning) which is the most dangerous part of the fight. In addition to the fear, the shadow will occasionally do an AoE that hits the party for 5-7k damage and increases attack and casting speed by 90% for 4 sec. This seems much scarier than it actually is. During all of this Paletress will keep attacking the party as usually, even casting Renew on herself and the shadow. Make sure to interrupt or purge this whenever possible, as Paletress can come out of the shield at full health. Once the shadow is killed, the shield will go down and the fight will resume like before until Paletress throws in the towel.

There’s a lot to worry about in this fight, especially for a resto shaman. Make sure to keep tremor totem down to help with the shadow’s fear, which can be crippling if it’s left uncontrolled. Since the damage from Paletress is scattered at first, Lesser Healing Wave is a great tool for quickly topping off whoever she targets with her various spells. You have two options for dealing with Renew: either Wind Shearing the cast or Purging the buff once she gets it. Both work, but ideally you’ll have another interrupter to help deal with it. When the shadow is summoned get ready to do a lot of healing, as both Paletress and the shadow’s hefty AoE will be going around. I recommend having your party bunch up as much as possible to allow for maximum use of Chain Heal, as damage will be flying around quickly. Try to keep out of melee range though, as he does apply a 2k a sec dot to random players in melee range. Like mentioned above, try and use yourself as a link in a Chain Heal to connect the ranged and melee. Otherwise, try and keep your cool in this seemingly chaotic fight and you’ll be fine.

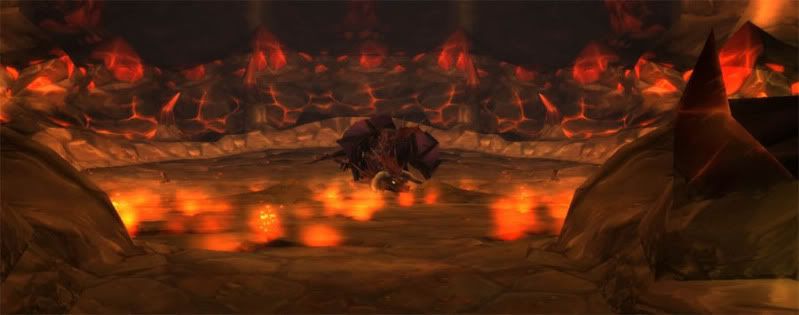
Once you’ve trashed the best the Argent Crusade can throw at you it seems like you’re ready to move on when suddenly a good old buddy arrives…The Black Knight. He quickly dispatches the announcer and turns to you.

Phase 1

The first phase of this fight is pretty simple. Imagine that you’re fighting a terrible DK outside of Ironforge or Orgrimmar and you’ve got the gist of it. The Black Knight (henceforth referred to as TBK) will summon the poor announcer as a ghoul and start attacking whoever wants to tank him.

He does use both Plague Strike and Icy Touch, both of which do reasonable damage and leave their respective diseases on the target. These both do damage over time as well as buff his Obliterate by 30% each. Obliterate already does 120% weapon + 1500 on Heroic, so this can be quite nasty if both diseases are left to tick on the tank. In addition to this he has a new ability, which stuns a nearby target for 2 sec before knocking them back and causing around 13k shadow damage. Similar to Eadric’s hammer, this shouldn’t outright kill a full health player, just make sure to keep everybody topped off.

His Ghoul can be tanked, but will mostly likely end up on you at first, so just make sure the tank is aware of this. He will Claw, which does minor damage and causes him to change targets, which he will then Leap over to. If he gets low on health or TBK is killed before him, he’ll explode for about 8-9k damage in an 8 yard range, so try and make sure nobody is too close when either goes down.

Similar to the rogue in the first fight, Cleansing Totem will do wonders here when it comes to keeping the two diseases off the tank. Otherwise raid damage will be minor here, mostly at the hands of the ghoul with ADD. Keep everybody topped off and save your mana for the final two phases, which get much more interesting.

Phase 2

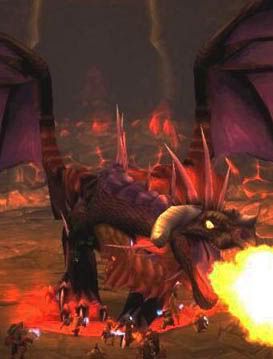
As I’m sure we’ve all figured out by now, a simple flesh wound won’t stop our good fellow, so once you take out his “mortal” form, TBK rises again as a skeleton, and continuing the terrible DK trend, immediately casts Army of the Dead, summoning 8 Risen Champions from the soil of the Arena to attack you. These all act like the Ghoul from phase 1 minus the leap ability, so make sure your tank uses every AoE tanking ability they have. TBK also occasionally drops a Desecration on the ground, which causes 2k shadow damage every 2 sec and slows movement by 50%. It looks similar to a Paladin’s Consecration except more…evil. Get out of this as quickly as possible. This is especially stressful for healers, as you have to stop casting for a good 2-3 seconds as you stumble out, so use any instant casts you have while you move.

What makes this phase especially interesting is that TBK will cause dead Ghouls to explode. When a Ghoul gets low (or dead) it’ll start a 4 sec cast that causes it to explode for 10k shadow damage, so that if all 8 explode at once anybody nearby is toast. This means you have a few options for how to deal with this:

If you have a good amount of AoE (especially a mage) you can root and burn all the ghouls at once, far away from the tank and melee. They only have around 35k health, so with two players helping they’ll go down relatively quickly.

The tank can kite the Ghouls and TBK around. Since the explode has a 4 sec cast, the Ghoul will stop long enough to cast it while the melee and tank run away. Problem solved.

Regardless of which strategy you use, make sure you agree on it ahead of time.

As a resto shaman healing this fight depends on which strategy you use for dealing with Ghoul explosions. If you’re melee heavy, rely on Chain Heal to keep people up through the spotty random Ghoul damage. If you’re going with the AoE strat, keep an eye out for loose Ghouls breaking for the ranged and toss spot heals to them when necessary. If you don’t get too many bad explosions, damage on the raid and tank here is light. If you get stuck in a Desecration, use Riptide on yourself and run out as quickly as possible.

Phase 3

While a quadriplegic torso would’ve been a hilariously fitting end to this battle, our fellow just won’t give up. Once you destroy his physical form he reaches out from beyond the grave as a spirit in a final bid for The Lich King. This final phase is a straight burn phase, as he immediately starts AoEing the party for 3k damage with a stacking debuff that increases magic damage taken by 15% He also tosses around a debuff that increases damage on a specific target by 200% for 10 sec. This means that after a while, he’ll become unhealable, so pop all cooldowns and take him out as quickly as possible.

Resto shaman should use Heroism a few seconds after the pull. Drop Healing Stream Totem and start casting Chain Heal. Have your party stack up (or if your ranged is being uncooperative, do the chain strategy from before) and focus your Chain Heal on whichever target has the 200% damage debuff. This fight will be over before you run out of mana for good or ill, so just keep going and hope your DPS is up to snuff.

Once TBK finally falls the instance is over. Short but sweet, enh? Collect your amazingly good loot and steady yourself for the real challenge: Icecrown.

Here are some good Resto Shaman items from this instance on both heroic and normal for you to take a look at:

Normal:

Carapace of Grim Visions

Leggings of the Bloodless Knight

Tears of the Vanquished

Heroic:

Girdle of the Dauntless Conqueror

Mariel’s Sorrow

Symbol of Redemption

Spectral Kris

Thursday, July 9, 2009

Freya + 3 Or How I Finally Learned How To Heal

Every level of content has those decisive fights that really force you to L2P. Pre-BC Patchwerk taught me how to heal dance and really make the most out of my Holy Paladin. During BC Teron Gorefiend sent me scurrying to Elitist Jerks trying to find a way to maximize my sloppy threat rotation.

This time around the honor is going to Freya + 3.

For those unfamiliar with the fight, it's the usual Freya, which isn't especially hard on healers, but with a few twists. Similar to OS3D, there are three random minibosses in the room that each have a certain twist they add to the fight. Unlike OS3D the adds do not need to be offtanked during Freya + 3.

One add brings a heavy damage AOE that silences if you're caught casting during it.
Another add brings a root that does significant damage to those that it hits.
And yet ANOTHER adds a minor nuke in the form of a pillar of light that hits people who are bunched up.

All of these adds also increase the physical and magical damage of her and her adds by 50-75%.

Needless to say, the healing output required spikes significantly and is complicated by the fact that you can't pre-cast to heal the AOE for fear of getting locked out.

For the first time ever I really felt like I was healing. I felt like every single tool on my bar was getting used. The difference between using LHW and HW was an active choice based on the situation at hand. If I didn't monitor my riptides and keep all 3 HoTs rolling at once at all times, people died. My HPS went from a paltry 2.5k to 4k not out of simple optimization, but out of necessity.

Now that I've seen what the LHW / HW + RT build can really do in the right situation, I don't think I'll ever be able to look back.

Now onto Firefighter.

Wednesday, July 8, 2009

I haven't touched this is a while!

The end of the school year as a teacher is a strange and magical time of exhaustion, anticpation, and bitter-sweet depression. Needless to say, it also makes raiding and keeping abreast of all that is Warcraft difficult.

So here's to that.

Now that summer is upon me, I'm revisiting this blog as an attempt to not only get back into the blogging spirit, but also to examine some of the finer points of playing a Resto Shaman in these difficult times.

Mek and Sixthy are yelling about this or that, raid spots are being stolen by those dastardly priests and druids, and the very core of our unique playstyle is being snapped up even now by paladins!

But hey, now we can drop 4 totems at once right? RIGHT!?

In all seriousness, these are very exciting times for the Resto Shaman.

To recap: the vast majority of Resto Shaman may be looking at the cries of 'Our HPS can't compete' and shaking thier head quizically. I know I was. Then I stepped into hard mode Freya (3 Guardians) and stared blankly as the holy priest I was with was pulling 5-6k HPS while I was struggling to manage 4k.

The clouds parted, the heavens poured out, and I suddenly understood what all this LHW / RT nonsense was really about.

Before, the facerolling wonder of Chain Heal, which got us through BC raiding with top marks, was all there was to playing a Resto Shaman. This attitude and muscle memory rolled right into WotLK raiding. Chain Heal held it's own in Naxxramas and, depending on your experience, OS + 3D. What's made all this so difficult for so many Resto Shaman is how stark a shift it's been from hitting Chain Heal over and over again to spot healing with hasted Lesser Healing Waves and Riptide. But this is the future.

In patch 3.2 significant changes are landing to two of our most useful talents when it comes to this style of healing: Tidal Waves and Improved Water Shield.

IWS is turning into a strange new version of Illumination, as no longer do procs consume WS bubbles.

Tidal Waves is also changing, replacing the haste buff on LHW with a 25% crit buff. This means no more .9 sec LHWs, but this means a few excititng things:

1) More Ancestral Awakening procs
2) Better uptime on Ancestral Healing (also changed to a flat 10% physical damage reduction)
3) More IWS procs

The current talk on the street is that, with these changes, we might be shifting to a primary tank healing role, especially considering the fact that Beacon of Light will start being affected by total and not just effective healing in 3.2.

These are exciting times. Let's all roll with the changes as best we can. Over the next few days I'm going to be posting guides to various difficult encounters in a variety of raids, especially Ulduar hard modes.

Let the totems roll.

Wednesday, January 28, 2009

Healing UI: Suggestions


By no means a perfect UI, but a good example of what you should be shooting for. Unlike some UI posts, which give you a cookie-cutter UI to build yours around, I'm going to tell you what makes for a great healer UI and let you build your own. Using a pre-built UI is kind of like wearing somebody else's pants...it never quite fits and you're always adjusting the crotch. When you build your own UI there's a certain sense of innate familiarity to it because you made the decision to put things where you put them.

Healer UIs are slightly different than other class' UIs because of the fact that our eyes are inevitably drawn to our raid frames. If you use a click-to-heal mod like Clique, you'll be spending 95% of your time clicking on those small colored boxes, so you need to make sure they're visable and in a central location. Putting them off to one side or another can pull your eyes away from the action on the screen and cause you to stand in void zones, fire, or other environmental hazards. I place my Grid window right underneath where my character is on the screen so that my eyes are never far from my feet for fear of swirling black voids of doom.

Another important thing is having easy to read unit frames. Unit frame mods will display all sorts of great and potentially useful information, but if they're too cluttered you'll never be able to figure out something as simple as "How much health does my tank have?" You want to be able to get a read on your target's health, your health, and your mana with just a momentary flick of your eyes. Any longer and somebody could die.

A mod that is practically required for raid healing is Decursive, which turns cleansing into a whack-a-mole type game. The small colored boxes between Grid and Recount and my decursive boxes and they light up when people get debuffs I can remove. Position these somewhere that's easily accessable, as some debuffs don't give you much time to remove before it's too late. I like to keep mine next to Grid so the mouse travel time is short.

This might seem redundant, but I like to have party bars open all the time. As a resto shaman you'll find yourself beholden not only to your own mana bar but also to the mana bars of your party memebers, as mana tide totem only works for your party. Having party windows open lets you quickly get a read on your party's mana so you can drop mana tide at just the right time and not when your party is all sitting at 95% mana.

From there it's just a matter of trying to make something that you like. Include the information you need to function as a healer. I try to keep it simple and uncluttered so I have the best chance to see what's going on without interruption. 

The most important piece of information I can give somebody who is designing thier UI is that a UI should assist in your healing, not dominate it. If a mod is taking up too much real estate or spamming you with annoying messages, get rid of it. With the exception of a few core mods, you can do fine with any setup as long as you're comfortable with it.

Trinket Talk Part 1

Trinkets are confusing. There are so many of them, they have so many different stats, and then there’s the procs and on-use abilities. Some give you additional spell power, some give you stacking spell power, some reduce the cost of your next spell…it’s enough to drive a spreadsheet loving mathematician nuts. So that’s why I’m going to point out two blue trinkets that are relatively easy to get and unexpectedly good.

Soul Preserver

This guy, which drops from Mal’ganis in regular (and only regular) Culling of Stratholme, doesn’t look too special at first glance. Looks a lot like the Eye of Gruul from TBC, just updated for 80. You might even pass on this to a Paladin that wants it for his holy set since they’re ALWAYS casting spells.

Well sir (or madam) you’d be missing a small and interesting little side-note for this trinket.

The proc, which makes your next cast cost 800 less mana, procs off every heal, not just casts. That means every full jump glyphed chain heal has 4 chances to proc this. Every earthliving tick from that chain heal has a chance to proc this. Your riptide ticks can proc it. Even with a 2% proc rate, that’s still a lot of procs. Numbers on the EJ forums suggest an effective mp5 rate ranging from 33-141 mp5, which, with the spell power, makes this a formidable trinket especially if you’re spamming chain heals.

The icing on the cake: no internal cooldown right now.

Spark of Life

While a bit more difficult to obtain than the Soul Preserver, this trinket, which drops off Sjonnir The Ironshaper in Heroic Halls of Stone, is slightly more geared towards 25 man raid level healing, which emphasizes haste and chain heal spam more than in 5 and 10 mans.

First off: haste rating. Always good.

But then the proc. Similar to the Soul Preserver, any proc that grants or deducts mana can be converted into an effective mp5 rate when chain casting, which you’ll be doing as a resto shaman in raids.

This trinket? 40-60 effective mp5 depending on haste rating and level of spam. Even factoring in the 45s internal cooldown, this trinket still gives significantly more effective mp5 than other options.

What makes both these trinkets especially nice is that the heroic level mp5 trinket, the Winged Talisman, only sports 29mp5 and an on-use rather than passive effect.

While there are some better trinkets down the line, these two are relatively easy to obtain pre-raid and can provide a significant edge to the plucky and undergeared resto shaman.

Tuesday, January 20, 2009

Healing Heroic Nexus

If you were to ask trade chat on your server what heroics are the easiest for a new 80 to complete you'd probably get a lot of flak, but somewhere in there you'd probably hear two answers: Nexus and Utegarde Keep. Both of these low-level instances stay pretty easy to accomplish with the transition to heroic.

The purpose of this post will be to outline some general strategies for trash and specific strategies for bosses that can assist a new resto shaman in healing this slightly tricky instance and nabbing thier very own War Mace of Unrequited Love.

Trash Strategies

Trash in heroic nexus doesn't vary much from what it is on normal, but there are still a few things to keep an eye out for:

Azure Enforcers before Anomalus can mortal strike the tank, which can be pretty scary if they do it early on in the pull. Be ready to toss chain LHWs to the tank to keep him up if his gear isn't quite up to snuff.

Stewards in the pulls before Telestra have the Blood Elf racial Arcane Torrent, which silences everything in 10 yards, so make sure to stay back on these pulls.

Finally, right before Telestra there is a pat with 2 Mage Slayers and a Blood Elf mob, be ready for somebody to aggro this pat unless you clear it ahead of time. Most groups I've been in simply can't resist the urge to step back just a bit too far and end up grabbing it.

Ormorok the Tree-Shaper

(This giant piece of rock drops your Frozen Forest Kilt which is one of the better pre-epic resto shaman leg pieces and worth trying to obtain. Not only does it give you a hefty amount of mp5, but it also looks dead sexy.)

Your biggest issue with this fight on heroic will be watching for the heavy damage the tank will be taking. There isn't a direct AoE ability in this fight, but like most fights in WotLK bad dps can get themselves killed thanks to Ormorok's Crystal Spikes and Spell Reflection. Since the damage of the Crystal Spikes has been significantly increased on heroic, expect most undergeared dps to get either 1 shot or almost 1 shot by it, so be ready with a quick riptide and LHW to get them back up if you can spare it. If your tank can't survive on his own long enough for you to heal a facerolling dps, they might be too undergeared for the fight.

The other annoying element of this fight that's new to heroic mode is the inclusion of Crystalline Tanglers to the fight. Every now and then Ormorok will summon one that will latch onto a nearby player and chain root them. This becomes an issue when the recipient suddenly finds themselves unable to juke Crystal Spikes. I ask DPS to kill nearby Tanglers when they can. If you yourself are getting rooted, either ask a DPS to help out or toss a Flame Shock / Lava Burst combo at one to take it out.

At low health he does Frenzy, increasing his damage by 100%. Just spam heals as best you can through it and collect your loot.

Grand Magus Telestra

(Killing this confused lady will net you Bands of Channeled Energy, some of the best pre-epic mana regen bracers around. These are probably your best option pre-Naxx, as it isn't until you start getting really geared that haste starts to shine.)

Probably the most chaotic fight in the entire instance, this one will be a hefty test of your ability to react dynamically to changing conditions and keep both dps, the tank, and yourself alive.

At first the fight is relatively simple. She casts a firebomb spell that hits the tank and deals damage to all targets around them. If the melee dps is having issues with this, switch to chain heal to keep them and the tank up. Make sure to heal up the group after a Frost Nova in preperation for the high AoE damage of her second phase. The vortex-like attack where you go flying through the air is low enough damage to be practically ignored. I like to toss a riptide on myself or the lowest party member during it since any non-instant cast will be interrupted.

At 50% the fight gets interesting. She does the split, just like on normal, but since it's heroic, everything is significantly crazier. The three forms have the same abilities as on regular:

Arcane: Polymorph and Time Stop
Fire: Fireblast and Scorch
Ice: Ice Barb and Blizzard

Your biggest challeneges will be outhealing the Blizzard, which hits everything within 40 yards for 2000 frost damage every 2 seconds, and avoiding the lockouts of Polymorph and Time Stop. For this fight I strongly recommend dropping a Frost Resistance totem to help mitigate the Blizzard damage.

If your group has a strong CC class (like a mage) you can direct them to lock the arcane form down, which will get rid of the two most dangerous abilities in the fight. If you lack such a class, heavy dps + a hex will hopefully be enough to lock out the arcane form long enough to kill the other two forms. Once the arcane form is controlled, kill the ice, then fire forms.

I tend to just throw around LHWs during the add phase of this fight, as it's just mobile enough to waste the bounces of chain heal. Be ready for everybody to pull aggro here, as even skilled tanks can easily get overwhelmed when having to tank 3 casters.

Repeat this at 10% and you'll hopefully be the proud owner of some new bracers!

Anomalus

(Another great pre-epic resto item off this boss: Amulet of Dazzling Light. Spell Power? Check. MP5? Check.)

Depending on your group makeup here you could either have a really easy time of this boss, or a slightly harder time.

This is a pretty basic tank and spank until something unique happens: The boss will summon a Chaotic Rift near him that will do light AoE damage to anything within 15 yards AND summon Crazed Mana Wraiths that will quickly, and practically irrevocably, aggro onto you and start pelting you with Arcane Missiles.

There are two different ways to handle this:

If you have a lot of melee DPS:

Your dps will be taking damage from the Chaotic Rifts as they struggle to kill them, which means you'll want to use chain heal liberally. At the same time, you'll probably be taking medium damage from the Crazed Mana Wraiths, so I like to position myself close enough to the melee clump to catch chain heal jumps from them (or, if you're low on health yourself, jump chain heal to them) but far enough away to not get the AoE damage. Cast chain heal on whoever is taking the most damage (most likely you).

If you have a lot of ranged DPS:

Since most of your dps will be outside of the AoE, you can use the more effective LHW here, which doesn't feel the effects of spell pushback nearly as much as the longer chain heal. During Chaotic Rifts, keep an eye on your health and watch to see if any of the ranged dps pulls a Wraith off you.

Anomalus will spawn Chaotic Rifts at random intervals during the fights. At 75%, 50%, and 25% he'll spawn a Rift and shield himself for 45 sec or until the Rift is destroyed, so be ready to heal at those points.

Keristrasza

(War Mace of Unrequited Love. mmmm yeah. Wait. What?)

This fight, despite all of the oddness that occurs during it, is actually relatively straight forward when it comes to healing.

First off, make sure to use Frost Resistance Totem for this fight, as a significant part of the fight is frost. From there, your healing strategy will revolve around the frigid conditions of the fight, which drop a stacking damage buff on you every second you're standing still. That means all the jumping your DPS is doing isn't a result of too many caffinated beverages, but instead a way of clearing the debuff before too many stacks hit them. The best way to keep healing while dodging this debuff is to use your quick and effective LHW to top off the tank and DPS.
Every now and then Keristrasza will root all the players for about 10 seconds, during which the debuff will keep stacking. Just keep healing through it as best you can. If you're lucky and all the DPS are stacked near the tank, chain heal while you're stuck. If not, throw around some LHWs to keep everybody alive. The important thing is to watch your debuffs and move right when the root clears to clear the debuff.
In the grander scheme of heroic bosses, Keristrasza is pretty easy with a low to moderately geared group as long as people don't let the debuff stack too high.

Commander Stoutbeard / Korug

Depending on your faction you'll either get the ornery dwarf Stoutbeard (Horde) or the equally ornery, but significantly smellier, Korug (Alliance). For many first time groups this fight will be a complete surprise, because the boss is frozen in ice along with some trash on the way to Grand Magus and isn't there during a normal mode run.

Along with the boss come two priests who need to be CC'd or killed first depending on your group makeup. I generally recommend blowing heroism and tearing them apart quickly to avoid any messes, but if you have a low DPS group that happens to have two forms of renewable CC, go for it.

The Commander only has three abilities of note, a AoE fear, incredibly nasty whirlwind, and a charge. The AoE fear can spell doom for the unprepared, as it's very easy to pull frozen adds in the room, but a tremor totem nullfies any fear-related worries.

The whirlwind will usually kill unskilled, slow, or green melee. It hits hard and quick, for around10k on plate. Word on the Wowhead forums is that post-3.0.8 the damage has significantly increased, but I haven't experienced it myself yet, so take this with a grain of salt. Most melee won't be able to survive a hit from the whirlwind, so they need to move fast or face splattering.

The charge is based on range: the nearest player outside of melee range will be the recipient. It can one shot low health clothies, so make sure the best geared ranged stands closest to the boss. Sometimes this will be you. This is perfectly okay, as odds are you'll be able to soak a hit and get yourself back up in time for the next, but never let anybody sit at the 75% mark during this fight, as every percentage of health can spell life or death during one of his massive damage hits.
Once you experience the abilities and drop your tremor totem you'll be fine. The healing output required on the tank is relatively low compared to other fights, so even if all your melee dps dies to whirlwind with some tenacity and vigor you can power through it with just the tank and healer while the melee dps run back.

And that's it. Hopefully you picked up the disgusting amount of great resto shaman loot in this lengthy and relatively simple instance. Even if you didn't get anything, enjoy your 5 (or 7 if it's the daily) emblems.

Friday, January 16, 2009

What Buttons to Push and When

So you've just hit 80 and you're staring at a blank talent window wondering "Well damn, where do I go from here?"

Odds are you've reached this point one of a few ways:

1) You're hardcore and you leveled resto from 70-80. Good for you. Enjoy doing what you've already been doing.
2) You leveled as a DPS spec, but ventured into resto from time to time to get instance groups. You've got a decent handle on our new abilities, but aren't totally in control of them yet.
3) You leveled as a DPS spec but haven't tossed many heals outside of the errant maelstrom weapon proc.

If you find yourself in the second or third category the odd mixed bag of abilites that is the resto shaman can be confusing and on occasion downright paralyzing. But that's what I'm here for, so you can learn from my mistakes and not your own!

Resto shaman healing in 5mans boils down to a couple of key concepts:
1) You've got a really solid AoE heal, but unlike Circle of Healing or Wild Growth, it requires the targets to be somewhat near each other to function.
2) You've also got a relatively effective short cast time single target heal. It's no Flash of Light, but it'll save a dying tank.
3) Many resto shaman abilities revolve around the use of our new 51 point talent: Riptide, which is our only instant cast heal.
4) You've got totems. Totems can do wonderful things if you know when to use them.

Lesser Healing Wave: Your Most Monogamous Heal

The first, and in my opinion most important, thing to understand before entering a 5man as a resto shaman is when to use Lesser Healing Wave and when to use Chain Heal. Early on in my heroic days I earned myself a lot of criticism from party members for using Chain Heal far too much, especially in high tank damage heroics like Culling of Stratholme.

As a beginning resto shaman, you probably won't have the mp5 or spell power necessary for an ez-mode Chain Heal spamming experience. For all it's beauty, Chain Heal doesn't really hit that hard considering the cast time. Many times did I let a tank fall low on health simply because of the 2.5 second cast time. A lot can happen in 2.5 seconds, especially to an undergeared tank. It's times like these that Lesser Healing Wave can save your butt.

In a situation where a major damage spike is about to hit the tank my thought process generally goes like this: Riptide (HoT plus the Tidal Waves effect, which reduces the cast time on your next two LHW / HWs) then, based on whether or not I've fallen behind in healing, I'll either cue up a Healing Wave in preperation for a big hit on the tank or hit the tank with two Lesser Healing Waves to put him back at a safe health level.

The important thing to remember is that, at lower gear levels, casting Lesser Healing Waves on the tank will save you mana in the long run over Chain Heal. For most instances, even heroics, the tank will be taking 90% of the damage, so you can keep him and your mana bar up by casting single target heals.

Chain Heal: Sometimes You've Just Got Too Much Love


There are times where, thanks to Blizzard's love for AoE damage, single target heals just won't cut it and you need to bust out the big guns. My favorite example of this is Zuramot from Violet Hold, the ornery Voidwalker with a penchant for setting up shadowbolt pelting Void Sentries. This is a definite AoE healing situation and one where Chain Heal's 'smart' heals really shine.

When you're faced with this, don't be afraid to request something from the DPS: stack on the tank. Chain Heal's jumps only go so far, and if you've got a significant number of ranged DPS, it can be hard to hit everybody with your heals. But if all the DPS are stacking on the tank, Chain Heal's newfound intellegence will automatically bounce to those who need it most. So in this case you can cast the initial heal on whoever needs it most (usually the tank) and let the bounces heal up everybody else. DPS should have no problem stacking on the tank, as even hunters have a reasonable minimum range for attacks now, so no excuses!

Riptide: Hit It And Quit It

To take it to the next level you can start weaving in Riptides. Riptide is a single target instant heal with a moderate HoT effect. It's wonderful for dropping on a tank before Web Wrap on Maexxna or healing that little bit of damage that will put a tank to full before a pull. But what really makes this ability special is how it can affect your other heals. Riptide's HoT effect provides, for it's duration, a 25% increase to healing recieved by Chain Heal that is consumed when used. So drop Riptide on a target and your next Chain Heal will be 25% more effective. Got some serious AoE DPS going out on a group and a certain DPSer is getting dangerously low? Hit him with a Riptide for a quick instant heal, then Chain Heal him and it'll get him back up to full.

The other important thing to keep in mind with Riptide is that it can proc Tidal Waves, which lowers the cast time on your next two LHW / HW casts by 30% and adds a passive 20% buff to the SP that affects HW and 10% to LHW. This drops LHW to a 1 second cast, which can save the day in a spam healing situation.

In other words, cast Riptide on cooldown. The mana cost won't put you out of business, but the wonderful healing, haste effects, and added mobility from an instant cast heal will keep you rolling in the green...text.

Totems: Sticking Around And Making Breakfast

And last, but not least, there are Totems. Something I didn't realize until late into my heroic career was just how useful resistance totems really were in healing. When you're healing a new fight and spells start a flyin' take a quick look at what element they're from. If they're nature, fire, or frost, you've got a totem to resist it. In a heavy AoE healing situation you can mitigate thousands of damage off the top just by dropping an applicable resistance totem.

You've also got a few other lovely totems to assist in your healing. Strength of Earth provides tanks with both TPS, mitigation (for Warriors and Paladins), and avoidance (doubly for DKs, who get Parry from Strength and Dodge from Agility). Wrath of Air provides you with an extra 5% spell haste, which, combined with Tidal Waves, can lead to some speedy heals. Finally, the red-headed stepchild of totems, Fire, now gives you added spell power in the form of Flametounge totem. My preferred totem setup for non-raid situations goes a bit like this:

Air - Wrath of Air
Water - Mana Spring
Earth - Strength of Earth
Fire - Flametounge

If your group is melee heavy (and lacking a frost DK) you might want to swap WoA for Windfury. If you're in an instance with a significant amount of poison or disease, Poison Cleansing or Disease Cleansing totems will be godsends as well. And can we forget the amazing Tremor Totem? Don't forget, Tremor dispels Sleep and Charm effects in addition to Fear, so when you're doing Mal'Ganis in Culling of Stratholme and you keep getting locked down by his Sleep, toss a Tremor Totem and rock his face.

So now you understand what abilities you have and when to use them. Next time I'll be reviewing some of the early heroics and healing strategies for each, including optimal totem setups, placement, and perhaps (if I'm feeling spunky) different tactics for different tanks. Until then, go forth my children and heal face.

Thursday, January 15, 2009

LHW vs. CH

I'll never forget the first time I saw a single-target healing resto shaman. It was in OS25 and I was overjoyed to be the only resto shaman in the raid. There were two other shaman, one enhancement and one wearing a bunch of what looked like elemental gear. It was full of crit rating, spell power, and haste rating. Then, to my surprise, I noticed that his spec was the same as mine.

The conversation went something like this:

Me: "Hey man, you left your grinding gear on. =)"
Him: "?"
Me: "You're wearing all ele gear?"
Him: "No, this is my healing set."
Me: "Uh...but there's barely any mp5 on it!"
Him: "Yeah. [Improved Water Shield]"
Me: "o_O"

Raiding through BC had left me with the impression that all resto shaman could do was spam chain heal. You just hit that button (3 for me) until the cows came home. So you could imagine my surprise when I found out that using Lesser Healing Wave in conjunction with heavy crit gear and the Improved Water Shield talent (which, at 3 points, gives your LHW/HW/Riptide crits a 100% [60% come 3.0.8] chance to expend a water shield charge) you could become an efficient and powerful single target healer.

Before we get into the numbers game, a quick introduction about what this means for you, the resto shaman.

Any major resto build will include Improved Water Shield in it, even if you're predominantly a raid healer who spams CH. The off-chance for a crit off of Riptide and the mana regen from that is good enough for the 3 points.

This means that as a resto shaman you can effectively fill two roles: single-target healer and raid healer. You're not quite as efficient of a single-target healer as a paladin or disc priest, but you're still one of the top raid healers in the game (perhaps the top once 3.0.8 comes out).

If you're assigned to single-target tank healing (for me this happens predominatly on Patchwerk, but it varies based on raid makeup) you want to throw on some of that ele gear that might be sitting in your bags or, if you're lucky, some of the resto gear that includes both mp5 and crit. Haste rating isn't as important for LHW as you can keep up tidal waves for most of the casts as long as you're hitting riptide on cooldown. What's important is that you're critting often enough that you're making back a significant amount of mana from water shield charges popping. It's like a mini Illumination. With a good crit rating and replenishment you can spam LHW until the cows come home. On Patchwerk, with some luck and skillfull cast canceling (dancing out of a .8 second heal is difficult, tell you what) you can chain cast almost endlessly. Combine this with the Lesser Healing Wave major glyph (which increases the healing of LHW by 10% on targets with Earth Shield on them) and you've got a powerful mana efficient quick heal.

The problem with this is that you have to waste a GCD every 3rd (or 4th with the Water Shield minor glyph) crit reapplying water shield. In some fights, Patchwerk especially, this single wasted GCD can mean a tank death.

On the other end of the spectrum you have the raid healing role, which requires heavy casting of every shaman's favorite spell: Chain Heal. When you're put on a raid healing there are two stats you're going to be looking at heavily: mp5 and haste rating. Mp5 is will allow you to keep healing while haste rating will increase the amount of healing you can put out. The two are tightly tied together, as too much haste will make you go OOM in the blink of an eye while too much mp5 will lower your healing output too much. The idea with setting up your gear for CH spam is to increase how many heals you can put out (haste) and how long you can keep it up (mp5).

The important thing to remember about all of this is that you can do both as long as you have the gear for it. You're one of the lucky healers that has the option to handle both of the major raid roles for healers, so take advantage of it!

So next time you see a resto shaman in what looks like elemental gear, give him a /salute and know that somewhere a holy paladin is crying. <3

And So It Begins...

Like many Warcraft players, I spend a significant amount of time outside of the game thinking about it. As an aging English major, I tend to get my jollies outside of Azeroth by reading various blogs and forum posts. I prefer to leave the number crunching and spreadsheets to the math majors and people who can count past 10. As a result of this, everytime I start a new class I generally spend a good amount of time reading up on it, on how the various specs function in raids, on the different experiences people have had with it, etc.

Shortly after getting into raiding (back when you could still get tier 2 out of Molten Core) I trolled the now-defunct Death and Taxes forums for tips on how to get the most out of my holy paladin. When I switched to a prot warrior for BC raiding I fell in love with TankSpot and it's various blogs. Now that WotLK has come upon us, I've finally made good on a pre-BC promise to reroll my paladin as a shaman. Shortly after hitting 80 and respeccing to resto I was surprised to find that there are surprisingly few good resto shaman blogs on the web. Sure there's occasionally a guest post on World of Matticus or the rare meaty resto theory post on WoW Insider, but even the ElitistJerks forums are painfully dry when it comes to good, quasi-anecdotal, resto shaman content.

So that's my goal for this blog. To create a place that is dedicated to all things resto shaman, from what gear to choose for what fight to reasons why we put up with having to constantly drop totems on trash.

But before we begin: a little about me.

I've been playing WoW since day 7 or 8. I began my career as a paladin on the Ner'zhul realm. I leveled from 1-60 full holy (mostly because I hadn't noticed the tabs for the other two trees) banking entirely on the Crusader seal bug (it raised your attack speed and power without lowering it with every hit, I could out-dps rouges with it no problem). Amidst all the crappy blue gear and constant combat in Hillsbrad I managed to find a raiding guild that I ran with all the way until Naxxramas. Around the 4H wall I took a break from raiding and switched sides with some friends, leveling a tauren prot warrior. I took him to a variety of different servers, eventually pushing through all of BC raid content (except for Kil'jaeden, never got to kill him for some reason) and learning a valuable lesson about the social side of the game. Realizing that my quest for purples and progression had left me drained and bitter, I fled back to my home: Ner'zhul, where I leveled my current love, my resto shaman.

Right now I'm working on finding a more solid raid position that works with my work schedule and spending most of my time filling the ubiquitous 'PUG healer in a guild run' role.

And now, onto the show!